 |
| Which poster-style is the MOST popular?? ...The "Fun & Funky" with the wavy yellow border! |
Posting Secret Stories® Phonics Posters!
 |
| Creative Cutting of Secret Stories® "Original" Posters! |
Have you ever wondered which Secret Stories® poster-style is the MOST popular?
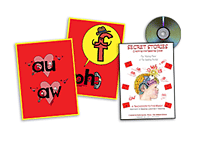 |
| "SPACE-SAVERS" |
 |
| "FUN & FUNKY" |
The winner for K-2 Teachers is..... "The "Fun & Funky" Kit! These are especially popular with early grade level, primary teachers, as their size allows for easy visual access from anywhere in the classroom where kids are reading and writing. These are often paired with a set of "Dual-Use Placards" for manipulative, hands-on use in circle time, guided reading, centers, etc.... (The Porta-Pics are also popular for individual use, both at school and at home, assuming that the little ones don't try and "eat" them! ;-)
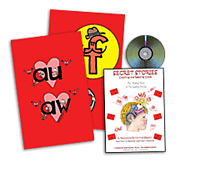
The winner for 3-5 (and up, as needed) is..... The "Space-Savers" Kit! These are most popular with resource room teachers (due to the smaller sized rooms) and with upper-grade level teachers who may have fewer students needing to reference them. Additionally, the Porta-Pics are equally popular for these groups for their portability (departmentalization, pull-out, home-reference, etc...)
You can find more info (as well as pictures) on both the Placards and the Porta-Pics, further below.
So, you've laminated all of your Secret Stories® posters and are finally ready to hang them on your classroom wall...
 |
| Secret Stories® Posters Ready to Hang! |
But which wall?
In what groupings??
Is there any particular order???
Is there a "right" way to hang the Secret Stories® posters?
This is the most frequently asked question that I receive during preschool weeks, especially when I visit schools for 'back-to-school' in-service and professional development and teachers are setting up their classrooms.
The short answer is NO... not really. But there are tips and tricks to ensure that you (and your students) get the most "bang-for-the-buck" with regard to easy visual access, both for reading and writing, across the entire instructional day!
So here are some Must-Do's....
1. Hang ALL of them up! (Do NOT wait to "teach" them first!)
Never wait to display a Secret until you have "taught" it first, as doing so defeats the whole purpose of using Secret Stories®, which is to accelerate access to the code, not limit it! Besides, the Secrets are not taught, they are "given," and without any expectations, much like food that's laid out on a buffet. Because Secrets are embedded into already social and emotional story-frameworks, kids will remember them, talk about them, and then suddenly begin using them to read and write words. This will happen years before their formal introduction as "phonics skills" on a traditional core reading scope and sequence.... IF they are all up and ready to share with learners, as needed!
Secrets unlock the sounds in words that kids can't read, and equip them with the letters they need to write words in the stories they want to tell. It is learners' encounters with text throughout the course of the instructional day (and across all subject areas) that most often dictate which Secrets they need. For this reason, all of the Secrets must be up and ready to go, as you never know what's looming just around the corner of your instructional day!
Additionally, having all of the posters up requires learners to visually scan through all the Secrets they don't know in order to find the ones that they do. This continual scanning process serves to increase learners' visual acuity so as to recognize patterns in text— even those in Secrets that haven't yet been told!
 |
| Students "Stalking" the Secret Stories® Wall! |
And finally (and most importantly) hanging all of the posters up on Day 1 allows learners to begin driving their own instruction, as the letters in words they cannot read are the same letters that are in the Secret posters on the wall, thereby prompting them to ask for the Secret! By taking advantage of these teachable moments as they occur throughout the instructional day, we can foster learners' "need-to-know" as the driving force behind their instruction and teach reading with the brain-in-mind!
2. Hang the Superhero Vowels®, Sneaky Y® and qu posters above (or in place of) their "counterparts" in your regular alphabet display.
I recommend hanging all of the posters together on one wall (which I like to call the "Wall of Secrets!") with the exception of the Superhero Vowels®, Sneaky Y® posters, which should be hung just above (or even in place of) their "like-letters" over your existing alphabet train (or whatever alphabet display is mounted above the main front board in your classroom.)
The purpose of this is to draw learners' attention to their alternative sounds, as unlike most Secrets, which explain what letters do when they get together, these letters have their own individual Secrets! This allows for easier sound reference when singing The Better Alphabet Song, which is the means through which learners acquire the individual letters and sounds using muscle memory in just two weeks to two months. (Note that the qu is somewhat of an exception to this, as it's actually two letters, but it's important for learners to see and understand that q won't make any sound unless it's with u, and that together they make ONE sound which is "kwa." I actually used a permanent marker to write in the letter u after the q on my alphabet train, and referred to it only as "qu".....it was like the imaginary letter "elemeno," but IT was REAL—Lol!)
 |
| QU from Secret Stories® BETTER Alphabet Vertical Anchor (full size shown, below) |
 |
| Secret Stories® BETTER Alphabet Vertical Anchor (full-size) for use with the BETTER Alphabet Song for Individual Letter Sound Mastery in 2 wks.- 2mos! |
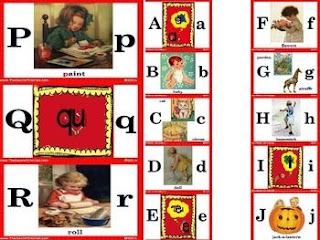
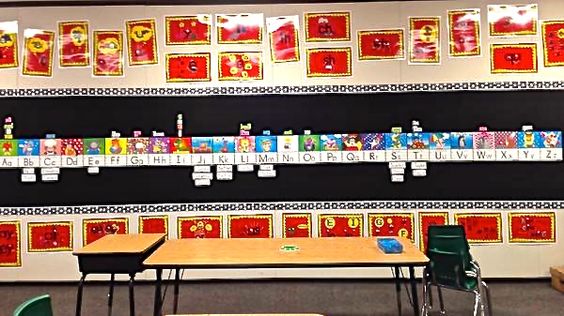
And on a side note, be sure that the picture cues on your existing alphabet train are accurate! This means that the picture cue for the sound of the letter o is NOT an orange or an oyster, as o by itself can only make its long or short sound, as in oak or ox. Likewise, the letter x should not be depicted with a picture of a xylophone or an x-ray (as is actually shown in the classroom alphabet picture, above) as those are its least likely sounds, with "ks" (as in box and ox) being the most likely.
All too often, the publisher's priority is finding a "pretty picture," rather than one that actually depicts the most likely sound of the letter. a letter's most likely sound! Additionally, it's also important to depict sound cues for both the hard and soft sounds of both c and g (cat/circus and goat/giraffe) with picture cues for both. For all of these reasons, I created the Secret Stories® BETTER Alphabet & Alphabet Mini-Mats (in digital format only.) Not only are the Superhero Vowels®, Sneaky Y® and qu graphics already built-in, but its vertical display option makes singing those "lightening-fast" Letter Runs a whole lot easier!
 |
| Secret Stories® BETTER Alphabet with Vertical AND Horizontal Posting Options! |
Secret Stories® BETTER Alphabet Song—
Individual Letter Sound Mastery in 2 weeks to 2 months
(Vertical or Horizontal Format Options)
 |
| Secret Stories® Better Alphabet (hard and soft C) |
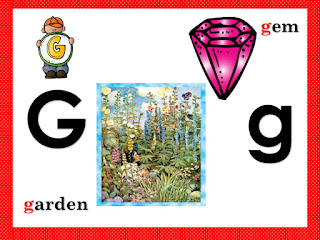 |
| Secret Stories® Better Alphabet (hard and soft G) |
The Secret Stories® Letter Run Song
(w/the BETTER Vertical & Horizontal Alphabet Train)
 |
| Secret Stories® BETTER Alphabet Mini-Mats for Individual Student Use |
3. When hanging the "Original" posters, be sure to create a visual barrier between the Secrets!
 |
| Secret Stories® "Fun & Funky" Posters |
 |
| Secret Stories® "Space-Saver" Posters |
 |
| Secret Stories "Original" Posters |
 |
| "Original" Secret Stories® Posters "Cut-Down" |
With no definitive border, the letter patterns on the original posters (when cut down) can appear to "run together" on the wall, which is why I recommend mounting them on a bright yellow or black backing (as explained in the Secret Stories® book) so as to provide a visual border between each one. I prefer bright yellow, although you can view several options in classroom pictures further down, below.
4. Ensure easy visual access from everywhere in the classroom they will need them!
I can tell you from personal experience that this is much easier said than done (as most of my classroom assistants who were tasked with moving all of the posters around to various locations in our classroom can attest!) Finding the perfect place in the classroom where students can easily access the posters, as needed during guided group, circle/calendar time, whole group activities, independent writing at their seats, etc...was quite the challenge. My students were constantly jumping to find the Secret sound they needed (when reading) or the Secret pattern they needed (when writing) and it drove me craaaaaazzzzzy! I think it can be especially difficult in kindergarten and first grade classrooms where there are so many learning nooks & crannies, as this makes easy visual access to ANYTHING virtually impossible (aside from possibly, the ceiling!) I finally did settle on a good spot where they remained indefinitely, but each new classroom and grade level posed a new challenge, so don't settle.... be creative! And don't be afraid to try a different spot if the current one isn't ideal....just be sure to bring your assistant a big, frothy Starbucks coffee when making the move!
Also, keep in mind that the Dual-Use Placards and Porta-Pics both offer easy solutions to this problem, as well providing the Secrets in a hands-on "manipulative" format for use by teachers and students around the classroom, as needed.
 |
| Secret Stories® Porta-Pics for Individual Student Reference and Home Use |
 |
| Secret Stories® Dual-Use Placards for Hands-On "Manipulative" Use |
There are also "cut-apart" cards in the back section of the Secret Stories® book that can be used when students are working in very small groups or outside of the classroom, one-on-one with a volunteer.
 |
| FREE Gum Ball Groups Pack |
And should you happen to have an extra set of Secret Stories® posters lying around (after upgrading to Secret Stories® Version 2.0 or "inheriting" an extra set from another teacher) you can use them to make something that your kids will absolutely LOVE LOVED LOVE.... a class "big book" of Secret Stories® that kids can take home and share with their parents on a rotating basis, or even as a special reward! Just re-mount them (if cut-down) on large construction paper and re-laminate the pages, and then bind them together into a book. Voile! A Secret Stories® Class Big Book— the perfect way to help educate your parents on what the Secrets are and how they work!
Extra posters sets are sometimes also ordered by schools to post in common areas where kids tend to congregate.... in the hallways, on the wall by the cafeteria line, behind the check-out desk in the media center, the front office wall, etc..., as it's a great way to spur conversation between students about "who knows which Secrets," as well as help to educate the parents on what they are, as kids love to share all of the Secrets they know when walking with them around the school. It also helps to further enhance learners' visual acuity for pattern-recognition in text.
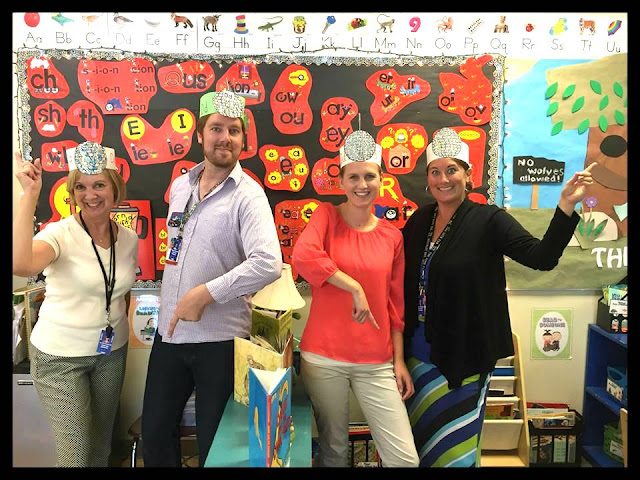
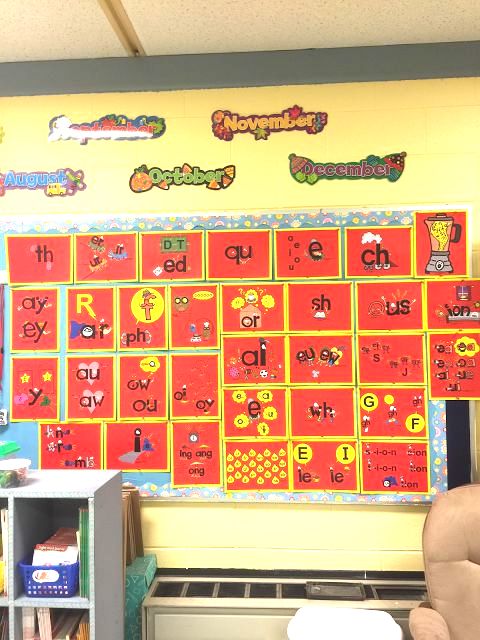
Below are some classroom pictures of the Secret Stories® posters that show different ways to display each version. And I want to give special thanks to all of the awesome teachers who have offered us this sneak-peek into their classrooms by sending in pics!
And I would LOVE to add your classroom pictures to the mix, so please share it with me on Instagram @TheSecretStories hashtag— #SecretStoriesPosters and #SecretStoriesTribe! You can also post them directly to the Secret Stories® Face Book Page or email it to me at Kate@KatieGarner.com.
 |
| Love this idea of putting students' names on their "Secret Story!" |
And finally, check out these miniature Secret Stories® posters in this adorable "Peep" Classroom, created by Mrs. Mac's Munchkins!
And to bring this "Posting Posters-Post" to a close, I just had to share an AMAZING "Secret Stories® door transformation that added a whole new level of excitement to the first day of school for some very lucky first graders! It was created by Brandon McAnulty, the husband of Renee McAnulty. You can read more about Mrs. Mac and her famous first-grade munchkins, here!
And here are some close-up pics....
HOW AWESOME IS THAT?!!
And if you're just getting started with the Secrets, here's a quick vlog
for some good tips, tricks and how-to's!
Until Next Time,
Katie Garner :-)
 |
Never Miss a Secret! Subscribe to the Newsletter! |
 | |||
|











It is truly a great and helpful piece of information and nice collection.
ReplyDeletebabysitting london